Table of Contents
Adding a Battery Changed Date Column to a Unit List
By combining the Custom Columns added in XTension 9.4 and the Contextual Handlers mechanism you can add a way to easily keep track of when the batteries were changed in any of your battery operated devices.
Use A Group
Adding the contextual handler to each unit would be a pain, luckily we can use a Group since all such events flow upwards from the Unit’s ON script and if not handled there then it will get sent to every group that the Unit is a member of. So we only need to write this code in one place.
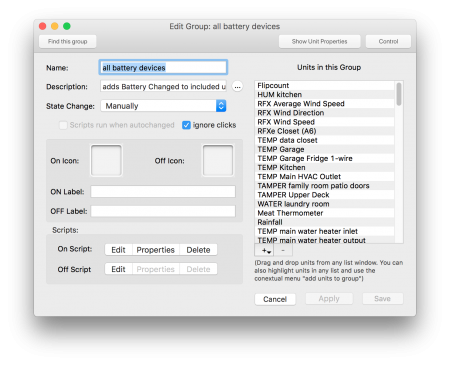
Create a new Group and add all your battery operated devices into it. Make sure to check the “ignore clicks” checkbox so that an errant click on this in a list won’t turn every single motion sensor in your home on at once.
The Script
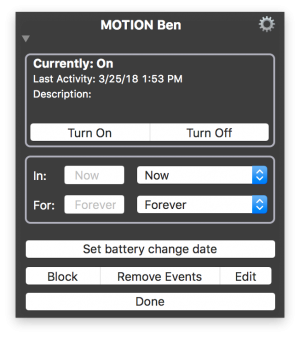
Whenever a contextual interface is going to be opened, either as a contextual menu or as a Detailed Unit Controls window being opened a handler in the Unit’s On script is run to see if the Unit wants to show any extra functions to the user. If the On script of the unit doesn’t return True from the handler, or if there is no handler, then the event will also be sent to every Group that the Unit is a member of. When the handler in the Group is run the value of ThisUnit will be the name of the unit that is receiving the event and not the Group! Place this code in the Group’s On script:
on getContextualHandlers()
  return {“Set Battery Changed Date”}
end getContextualHandlers

on setBatteryChangedDate()

  write log “A new battery has been installed for unit “ & (thisUnit)

  Set Unit Property “battery changed” to (current date)

end setBatteryChangedDate
Since the default of the Set Unit Property verb is to use (thisUnit) if no target is supplied there is no reason to write any more code than that. By pressing the button or selecting the menu a new date will be added to the Unit Properties that can be displayed in a List window.
Customizing Your List
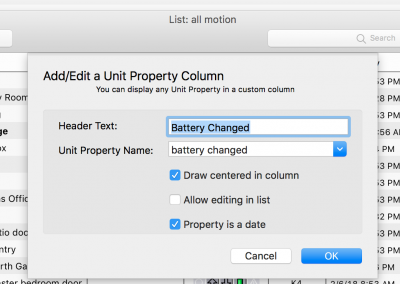
In a list that contains the same Units, control click or right click on the headers of the list. Select “Insert Custom Column” and the Custom Column setup sheet will drop down.
The Header Text field is the name you’d like to display in the Headers of the List. The Unit Property Name needs to be exactly the same as what you set in the Set Unit Property command of the script above. In the examples case thats “battery changed”
Make sure to check the “property is a date” checkbox as well. That will make the date properly display and be sortable both in the App and in the Web Interface.
Click OK and resize or re-arrange your new column so that it’s most useful to you.
Results
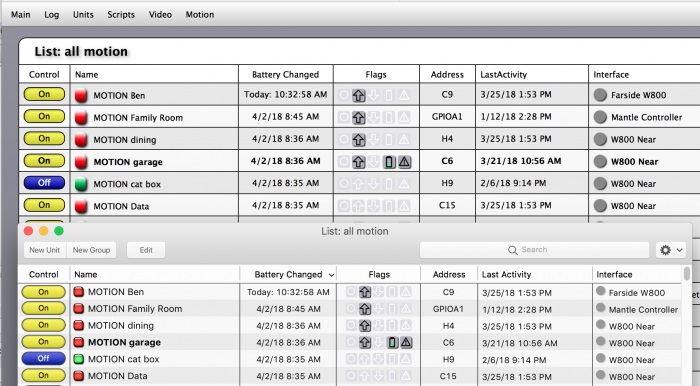
The resultant List window in the App in front and the same list being displayed in the Web Interface behind.
History
- The ability to create custom columns was added to XTension in version 9.4
- Contextual handlers on the web interface and in the Detailed Unit Controls window were added in version 9.4
- Contextual menu handlers only in the App have been around forever.


